by
Alex Lukachuk aka Chimaera
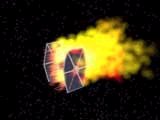
For many months I was searching for a tutorial that explains how to make a spaceship
flying in the air and burning because it was blasted by a laser or any other projectile.
And I finally decided to do this effect myself. I'll explain you how to proceed in 2 phases.
In fact, there are many methods to do exactly the same thing as I did and my method is far
from being perfect, but the effect you get at the end is pretty good and it can be used
in animations as well as in simple scenes.
I want also to precise that this Tutorial can be used in MAX R1.x. I deliberately
used MAX2's tools that also exist in MAX1.x. For example, I used Spray and not
ParticleArray or SuperSpray because these two last tools doesn't exist in MAX1.x.
You'll need to add the Combustion plugin (for MAX1.x users) and the Glow plugin
(for MAX2 users). They are all free ( they are included in the Blur Pack 1 plugin )
and can be found at Trinity Effects: http://www.trinity.com
The First Part : Building the Scene.
The first thing to do is to load the object we will "explode". I've chosen the Al Meerow
Tie Fighter which is one of the best meshes I've ever seen (if you have loaded the 3DS
scene, clean it up: delete all the lights and cameras ). Group the objects together.
Center the Pivot. Call the Group "Tie Fighter". Put it at the center of the scene.
Now, create a Target Camera and make it looking in the Tie Fighter's direction. The ship
must occupy about 1/4 of the viewport, not more.
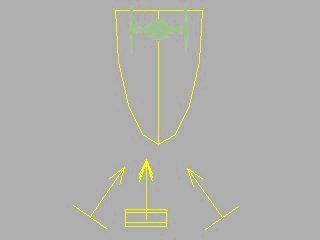
Create a Spray. Place it as shown below.

Now we will setup the parameters of this Spray. Go to Modify and select the Spray you've
just created. Now you will change the parameters :
Viewport Count : 500
Render Count : 500
Speed : depends on the speed you want to give to the flames (my settings are 800)
Variation: 6
Timing: Start: -35
Life: 35
Now you will create 3 more Sprays and place them as it shown on the picture below:

You can turn the Sprays in different ways, I've chosen the easiest way : to turn them
respectively at 90°, 180° and 270°. (the picture isn't exact about positions of the sprays)
To give more realism to the fire you'll add Space Warps to make these particles more chaotic.
It will add more realism to the scene. Accuracy isn't the most important factor when you
create an effect because nature isn't precise so you must do the same thing.
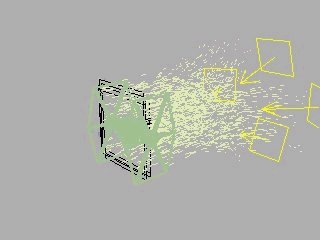
The Space Warp I've used to do my scene is Wind. So you must create 4 Wind Space Warps and
bind (with the Space Warp binding function not simple bind as for meshes) them to the
Sprays (each Space Warp to a different Spray) and place them as shown below and change
the parameters of the Space Warps (Strengh:50 and Turbulence:5) :
The next step is to add an Athmospheric Apparatus. I've added an hemisphere and placed it
as show below :
The first part of the tutorial is finished. Now we will setup environmental settings and
work with the Vpost.
Second Part : Setting Up Rendering
This part is shown as an example and can be changed depending on the effect you want to give.
You can change ALL the parameters if you want.
Go to Environment and add Combustion. Modify the parameters as show below:
Tendril Strech: 5
Flame Size: depend on the size of the Apparatus ( mine was pretty big, the grid was 1.000,
so I used 200 ) Flame Density : 1.0
After that, go to the Vpost. Add a scene event (the camera you've created). Deselect the
camera event and add 4 Image Filter Events ( at each time you must deselect the precedent
event, they must all be in column, see the joined *.VPX file ). These events must be "Glow
(frame only)" events. In each one you must select an Object Channel from one to 4 ( for
example the first one is 1 the second Glow event is 2 ect... ) You must choose a color
for each glow. One more time it depends on the effect you want to obtain.
Come back to the scene. Now you'll select the Sprays one by one and go to Propreties
( rightclick on the Spray ). You must choose a channel from one to 4 for each of the
Sprays. So they must all have a different Object Channel (from 1 to 4).
Return to the Vpost. Deselect Antialiasing in the Camera propreties.
You're ready to render!!!
Softer effect |

Stronger effect |
Comments? Suggestions? Send e-mail to Alex Lukachuk