|
How to create Engine Glow in 3D Studio Max 2.x
by Dave Myrick
This tutorial is VERY basic, so don't get too mad at me if it's not what you need...
I'm assuming that everyone out there has a 'basic' knowledge of MAX and I'm also assuming that you know
how to create 'splines', 'extrude', and use 'Video Post'.
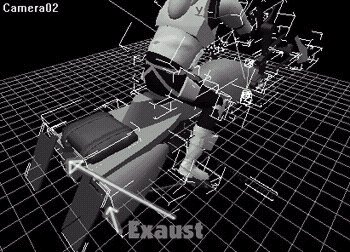
| First off, you need to know where the engine is... for this tutorial I'm using a
speeder bike as an example. But in theory, this tutorial should explain how to make
an engine glow for any other ship/transport. |
 |
|
Now that you know where you'll be making your engine glow, you'll have to make an
object that will act as the source for the glow. The source object should be in
likeness to the 'exaust port'. Depending on it's shape, you'll make your source
object. To create the object(s) I made two half-ovals using splines. After which I
extruded them to a depth in which the objects were half in and out of the exaust. |
 |
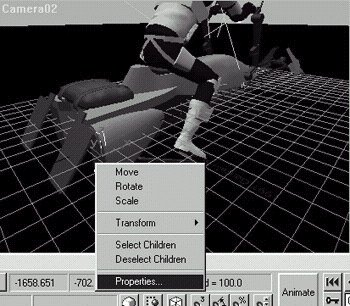
| Right click on your object. After you do so, click on 'Properties...' |
 |
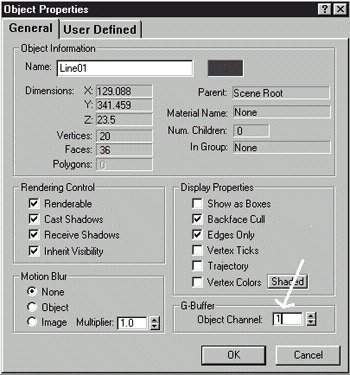
| Now that you're in the Object Properties window, go to the lower right-hand corner and
change the 'g-buffer channel' to '1'. Do this to all of the source objects in your
scene. This will enable the videopost filters to selectively use objects and apply
to certain objects. |
 |
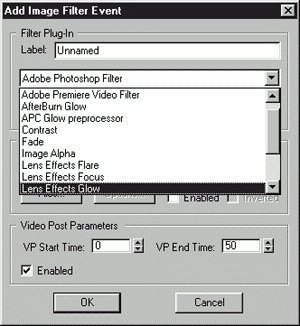
Now that your source objects are all set up, go into the video post. First off,
create an input by clicking on the input button  . Select the camera you want and click 'ok'
at the bottom. Next, click on the 'Add Image Filter Event' button . Select the camera you want and click 'ok'
at the bottom. Next, click on the 'Add Image Filter Event' button  . In the drop down menu select 'Lens
Effects Glow'. If you don't have it, you are either using an illegal version of MAX
or you aren't using Release 2. . In the drop down menu select 'Lens
Effects Glow'. If you don't have it, you are either using an illegal version of MAX
or you aren't using Release 2. |
 |
| After selecting 'Lens Effect Glow', click the setup button in the 'Add Image Filter
Event' window. This should open up the window shown at the left. Once this
window is upon, select 'Object ID' and make sure that it is set to '1'. NOTE: this is so
it applies the glow filter to your source objects. |
 |
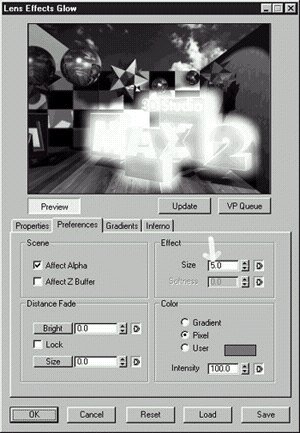
Next you'll go into the 'Preferences' tab. Inside this window you can decide the color
of your glow, the size, it's intensity, and much more. For the picture at the top of
this page I set the object glow to a size of 5. Depending on your scene you'll need
to play around with it. Click the 'OK' button and your glow filter will be all set.
Next, if you want to save your image, you'll click on the 'Output' button  . Inside this window, click on the file
button, decide where you want to put it, what kind of object (i.e. JPG, BMP, AVI) and
click ok. Once back inside Video Post, click the Render button . Inside this window, click on the file
button, decide where you want to put it, what kind of object (i.e. JPG, BMP, AVI) and
click ok. Once back inside Video Post, click the Render button  . Depending on wether or not you're doing
an animation click single or full-range. Select your image size, and click render! That's
about all there is to it. . Depending on wether or not you're doing
an animation click single or full-range. Select your image size, and click render! That's
about all there is to it. |
 |
Dave's Homepage
d_myrick@efn.org
|
|