Creating Lightsaber Effects in 3D Studio
Max R2.x
by Todd Miller
and help from Travis Stout, sort of.
This is a hella
hard effect to create (and make it look good), but Travis Stout
wrote a hella tutorial for making some good ones, but, it was for
R1.x. Required in his tutorial was Animated Glow and Super Glow
plugins, which are apparently not available for R2.x. So, I found
a way to make a pretty similar effect without Animated and Super
Glows. First things first, you need to get the Glow Baby plugin
from www.3dcafe.com (its free).
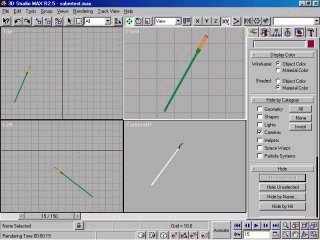
Step I: Prepping
up.
This will basically be exactly like Mr. Stout's up until we
get to the use of Glow Baby. You of course need a nice model of a
lightsaber. I used Qui-Gon Jinn's saber (by...) available at www.swma.net. Once you have that opened up you need a
blade (duh). Create a cylinder, radius of 0.5 and length of about
60. Move this cylinder so it just barely touches the inside of
your model. Next, you'll need a hemisphere on the end because
lightsabers are a bit rounded at the end (or at least they appear
to be :). Creat a hemisphere, radius 0.5 and move it right onto
the end of your blade. Now, right click your blade and click
properties, set its Motion Blur to 'Object' and do the exact same
thing to your hemisphere's properties. Might as well make it easy
on yourself and link your hemisphere to the rest of the blade.
Ooo...
neat.
Step II:
Materials are nice.
Jump into the material editor and set up a material with the
Diffuse slot totally white and the Ambient slot totally white.
Make Shininess 0 and Shin. Strength 0. Turn Self-Illumination all
the way up to 100. Set the Material Effects Channel to 1 (hold
down that thing that looks like a blue 0). This will give your
blade core a nice bright white color (yay!).
Step III: Glow
Baby, Glow!
Now to make use of the Glow Baby plugin. Create a Glow Baby
helper (helpers, Jonny Ow) and set the radius to 13, leave the
core color at white, then set the Mid and Outer Colors to
whatever you want (they should be the same color), I used purple
for this (198, 60, 249) but really any color will work (check
Travis's tutorial for a nice list of colors straight outta the
movies). Set the Mid Color Pos. to 0.7 and the Mid Color Size to
0.3. You can leave everything else at its default setting. Now,
we want to make a spiffy pulsing blade glow like the real ones
do, so, move the slider to frame 5, hit the animate button, and
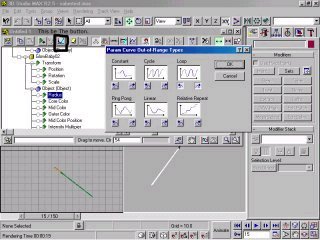
change the radius to 10. Now we want that too loop so its real
spiffy and neat. So go to Track View and Open the track view. Go
to Objects and find your GlowBaby and expand that until you can
see Radius. Highlight the Radius and click Paramter Curve
Out-of-Range Types. Hit Loop and click ok and close the Track
View.
'Nuff
Said. (Just a little blurry.)
Setp IV: Video
Post Time
Now, crack open Video Post and create a new scene event and
use whatever camera you want. Turn on Motion Blur and leave it at
default, or you can change Duration Subdivisions to 10 (I'll
compare leaving it at 2 and changing it to 10 below). Now at an
Image Filter Event, Glow Baby to be specific. Click Setup and use
Material Effects Channel 1, for your blade material, and use
whichever Glow Baby object is the one you're looking for. Now,
animate the hell out of it and voila! Light sabers! Feel Free to email me
some hella animations you made using my technique. I like the
word hella...


That's
2 Subdivisions on the left and 10 on the right.
10 takes hella long to render and looks a little grainy to me.
You be the judge.