by Andrew Keller
For this tutorial we will use the A-Wing mesh created by Jose Gonzalez,
downloadable here
to create a white starburst to the upper left of the ship. Before we begin, start up
bCAD and open the A-Wing file. Delete all existing lights and cameras by pressing
the delete button, then holding your mouse over the object you wish to delete and pressing
the left mouse button. Once all objects are deleted, press the right mouse button to
cancel the delete request. Center the A-Wing on your screen by dragging it into the
center, and then press the Zoom Custom button (F11) and change the scale to get the
desired effect (for this tutorial we will use a scale of 30). Once again, center the
A-Wing on your screen.
Now, create an omni light by clicking on the Omni Light button (picturing
a shining lightbulb). A crosshairs appears. Click somewhere to the upper-left
of the A-Wing to create the light. Choose a color for the light by clicking the tab
next to the word Colour (for this tutorial we'll use the existing color. The omni
light you just created will be the starburst for this scene.
Now that you've created the omni-light, hit the render button (picturing a sphere to
the left of a tall cylendar). Click the Create Camera button and a new window
appears. To adjust the parameters of the starburst you are creating, move the three
sliding bars to the positions you desire. For this tutorial the Halo Size is on the
second notch from the left, the Halo Brightness is all the way to the right, and the
Aperture is all the way to the left. Hit OK. To change these settings, you can
hit the Camera Setup button that is in the place of the previous Create Camera button.
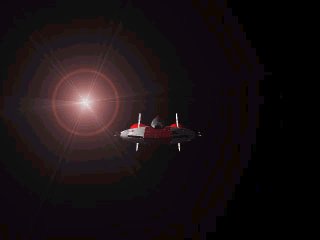
Your finished product should look something like this: